


STAS windsor wooden rail 200cm
Unit 2, Crusader Industrial Estate
Stirling Road Cressex Business Park
High Wycombe, Bucks, HP12 3ST
United Kingdom
T. 01494 459545
E. info@hangingsystems.com


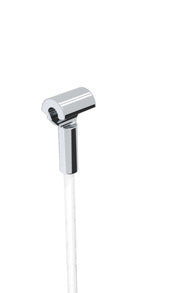
STAS moulding hook + perlon cord with loop 150 cm + STAS zipper


STAS moulding hook + perlon cord with loop 150 cm + STAS zipper
Unit 2, Crusader Industrial Estate
Stirling Road Cressex Business Park
High Wycombe, Bucks, HP12 3ST
United Kingdom
T. 01494 459545
E. info@hangingsystems.com

STAS moulding hooks (pack of 10)


STAS moulding hooks (pack of 10)
Unit 2, Crusader Industrial Estate
Stirling Road Cressex Business Park
High Wycombe, Bucks, HP12 3ST
United Kingdom
T. 01494 459545
E. info@hangingsystems.com
STAS windsor - Wooden picture rail
Our wooden rails are made out of Ayous wood and are FSC and PEFC certified. Ayous wood differs from other, cheaper wood since it does not deform nor splinter, and is perfectly suitable to repaint because of its smooth texture. Perfect wood for your picture hanging system! Can be mounted with screws, nails and glue*. Experience the pleasant warmth of wood in your interior!
* The bearing capacity of a glued rails is highly dependent on the surface, so care must be taken here. More information on how to best glue our wooden rails can be found at the bottom of this page.
The following hooks and cords can be used in combination with this system:
STAS smartspring on STAS perlon cord with loop (can be loaded up to max. 4 kg)
STAS zipper on STAS perlon cord with loop (can be loaded up to max. 15 kg)
STAS zipper on STAS steel cable with loop (can be loaded up to max. 20 kg)
5-Step Plan for glueing the STAS windsor
Step 1: Assess the surface
When glueing the STAS wooden rails it’s very important that the surface is well fixed and firm. This goes especially for wall paper. The wall paper must have been applied tightly and evenly to allow the STAS wooden rails to adhere as well as possible.
Step 2: Pick the right glue.
We recommend a glue that is especially designed to offer a very good adhesion on wooden surfaces. We advise you to go see your local DIY store for further recommendations.
Step 3: Pretreatment
Make sure that the surface and the STAS wooden rails are clean, dry, dust- and grease free before you start glueing.
Step 4: Glueing
The glue can best be applied in strokes (so don’t cover the whole rails in glue). Once the glue is applied you can place the STAS wooden rails on its surface (make sure it’s level!). The STAS wooden rails can at this point still be adjusted. When the rails are in the right place you can exert pressure so that the STAS wooden rails is well attached to the surface. Then allow the glue to dry for 24 hours.
Step 5: Hang your wall decoration
Hang your favorite wall decoration using the STAS hooks and cords and admire the result!

Installation is easy
Proper hanging starts with the right installation. Everything you need for a smooth and secure fixing is right here.

Downloads
For architects, we have bundled all relevant documents into one ZIP file. Here you will find: Autocad, Dxf, architect drawings, REVIT and other useful files.
Specifications
- Material
- Ayous wood
- Dimensions
- 18 x 45 mm x rail length
- Weight capacity
- 20 kg/m¹
- Condition
- New
- Installation difficulty
- Average – basic tools required
- Intended for
- Interior
- Suitable for
- Suitable for all types of walls (e.g. brick, plasterboard or wood)
- Product line
- STAS windsor
- Product category
- Wooden rail
- Features
- For long-term use | For self-assembly and professional use | Robust | Damage limiting | Paintable | Sleek and timeless design
- Repair service
- Carry-in
- Return window
- 30 days, no questions asked

How can we help?
STAS products are used worldwide in companies across a wide range of sectors. We offer a functional and attractive complete solution for every wall and ceiling, fully customized! Our expert project team with over 25 years of experience provides quick, no-obligation advice.